Archiv der Kategorie: Unkategorisiert

Sonoff Zigbee 3.0 USB Dongle

I want to move my garden irrigation system to Zigbee and got a Sonoff 3.0 USB Dongle Plus
These exist in two variants, mine is a ZBDongle-E, as is indicated on the box. I want to use it with Zigbee2MQTT, so the first step is to flash a new firmware to the device. It turns out this is actually quite easy.

Plug the device in, it should show up in dmesg a serial device.

709223.185691] usb 1-3: new full-speed USB device number 7 using xhci_hcd
[709223.340450] usb 1-3: New USB device found, idVendor=10c4, idProduct=ea60, bcdDevice= 1.00
[709223.340476] usb 1-3: New USB device strings: Mfr=1, Product=2, SerialNumber=3
[709223.340483] usb 1-3: Product: Sonoff Zigbee 3.0 USB Dongle Plus V2
[709223.340487] usb 1-3: Manufacturer: Itead
[709223.340489] usb 1-3: SerialNumber: xxxxxxxxxxxxxxxxxxxxxxxxxxxxx
[709223.342950] cp210x 1-3:1.0: cp210x converter detected
[709223.345094] usb 1-3: cp210x converter now attached to ttyUSB0

First we need to make it accessible:

sudo chmod 666 /dev/ttyUSB0

Easiest way to flash is via google chome, as i am on debian its just an „apt-get chromium“ away.

In chromium go to Silabs Firmware flasher scroll to „ZBDongle-E“ and follow the instructions. This will automatically install the newest version, at the time of writing this is 7.4.4 which is documented to work with zigbee2mqtt.

After flashing, create a data folder (mkdir data) and a docker-compose.yaml file:

version: '3.8'
services:
    zigbee2mqtt:
        container_name: zigbee2mqtt
        image: koenkk/zigbee2mqtt
        restart: unless-stopped
        volumes:
            - ./data:/app/data
            - /run/udev:/run/udev:ro
        ports:
            # Frontend port
            - 8080:8080
        environment:
            - TZ=Europe/Berlin
        devices:
            # Make sure this matched your adapter location
            - /dev/serial/by-id/usb-Itead_Sonoff_Zigbee_3.0_USB_Dongle_Plus_V2_xxxxxxxxxxxxx-if00-port0:/dev/serial/by-id/usb-Itead_Sonoff_Zigbee_3.0_USB_Dongle_Plus_V2_xxxxxxxxxxxxxxx-if00-port0

fire it up with docker-compose up, it will fail, press CTRL-C to abort.

Now edit data/configuration.yaml as root, fix your mqtt server address and add this section:

serial:
  port: /dev/serial/by-id/usb-Itead_Sonoff_Zigbee_3.0_USB_Dongle_Plus_V2_2xxxxxxxxxxxxxxxxxx-if00-port0
  adapter: ember

Now fire up the container again and it should work. See localhost:8080 for confirmation.

(If it does not you might still be using an old container, do „docker container prune“ to remove all stopped containers and try again)

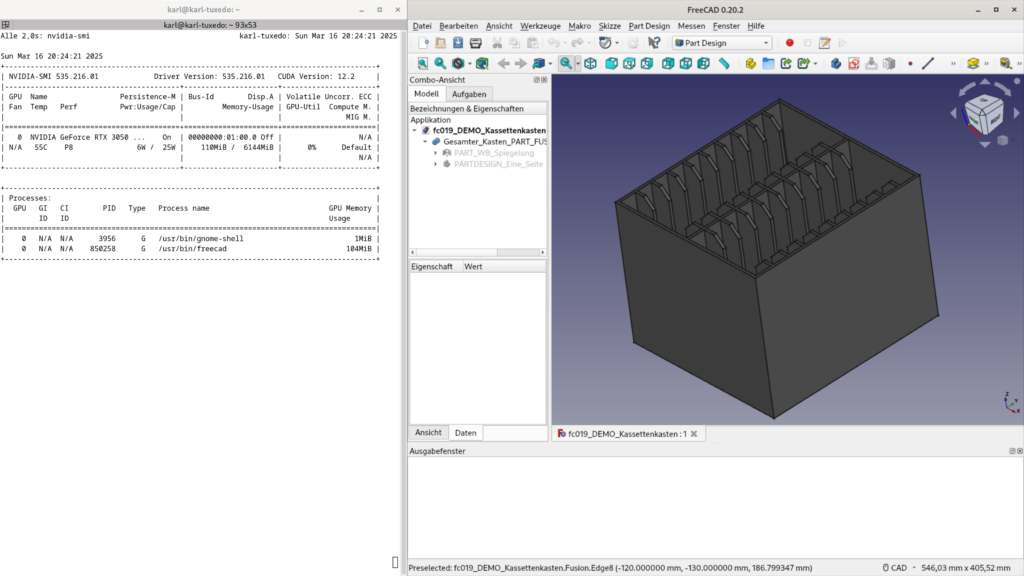
Make Freecad use Nvidia

After installing the Nvidia driver add the following to

/usr/share/applications/org.freecadweb.FreeCAD.desktop

Exec=env __NV_PRIME_RENDER_OFFLOAD=1 __GLX_VENDOR_LIBRARY_NAME=nvidia QT_QPA_PLATFORM=xcb /usr/bin/freecad - --single-instance %F

This does get overwritten on every update, i would be happy to hear suggestions on how to do that more cleanly.

Bank Austria App ohne Google, leider NEIN

Auf meinem Lineageos Samsung Telefon habe ich keine Google Apps installiert.

Die 2Faktor Authentifizierung der Bank Austria läuft jetzt nicht mehr über SMS sondern nur noch über deren App. Das ist zwar ärgerlich, aber zumindest kann man die Bank Austria App auch ohne Google Dienste zur Authentifizierung benutzen, man muss sie nur aufmachen und manuell neue Authentifizierungsanfragen abfragen, dann funktioniert sowohl der Internet Banking Login, als auch die Freigabe von Transaktionen.

Leider gibt es die App nur von Google, und ein runtergeladenes APK installieren funktioniert zwar, aber die Initialisierung der App geht nicht ohne Google Services. Leider sehr traurig.

Die einzige Möglichkeit ist die Gapps mit Lineageos mit zu installieren, dann die Bank Austria App zu installieren, die Anmeldung in der Bank Austria App durchzuführen und dann die Google Dienste am Handy zu deaktivieren.

Debian 11 cryptroot remote unlocking

Unlocking a fully encrypted setup on Debian remotely via ssh is now quite simple:

Install dropbear-initramfs

newserver: sudo apt-get install dropbear-initramfs


after this we need to get our ssh key into the initramfs. Simplest way is to log into the server once with the keys and then copy them to initramfs. To do that copy your keys from your main machine:

laptop: ssh-copy-id karl@mediaserver

then log into the machine and copy the authorized keys file:

newserver: sudo cp .ssh/authorized-keys /etc/dropbear-initramfs/

Add Hostname

by default the Initramfs gets it IP via DHCP. If you want to set a static IP you can do that with a IP parameter in /etc/initramfs-tools/initramfs.conf

Syntax is:

IP=<client-ip>:<server-ip>:<gw-ip>:<netmask>:<hostname>:<device>:<autoconf>:<dns0-ip>:<dns1-ip>:<ntp0-ip> 

If you use DHCP the Initramfs will get a IP but it will not set up a hostname. I find this inconvenient, fix it with this line in /etc/initramfs-tools/initramfs.conf

IP=::::debian-mediaserver:::::

Now rebuild your initramfs with new keys and IP settings:

newserver: sudo dpkg-reconfigure dropbear-initramfs